Responder poisoning – Attack & Defend (Ep.1)
This is the first episode of a new series called Attack & Defend! In this series, I’ll demonstrate different types of attacks as well as the corresponding defensive measurements to protect against them. If you’d like to see an overview of all the episodes, click here.
Today’s episode focuses on LLMNR, NBT-NS, and mDNS poisoning using Responder.
NBT-NS, LLMNR, mDNS
Before we jump into the attack, let me first explain what exactly we’re targeting.
NBT-NS, LLMNR and mDNS are network protocols used for name resolution. While NBT-NS and LLMNR mainly act as fallback mechanisms when DNS isn’t available, mDNS is typically used for local device or service discovery. Although they share similar functionalities, there are key differences in how each of these protocols operates.
NBT-NS – “NetBIOS over TCP/IP Name Service”
NBT-NS is a legacy Windows-only protocol used for name resolution before the usage of DNS or Active Directory. It is one of the three core NetBT (NetBIOS over TCP/IP) services and operates on UDP port 137.
NBT-NS name resolution process:
- A client sends a broadcast on the local subnet asking, “Who has this NetBIOS name?”
- All other devices on the subnet receive the request
- The device that owns the requested NetBIOS name responds with its IP address
LLMNR – Local Link Multicast Name Resolution
LLMNR is a protocol primarily used on Windows systems. It queries hostnames within the local subnet using multicast and operates over UDP port 5355.
LLMNR name resolution process:
- Clients send a LLMNR multicast request into the local subnet asking, “Who is <hostname>?”
- Other clients on the same subnet listen for these LLMNR requests
- The client that owns the requested hostname responds
mDNS – Multicast DNS
mDNS is a cross-platform protocol used to resolve DNS requests on the local network using multicast. It operates over UDP on port 5353.
mDNS is also used for service discovery (DNS-SD) and device advertising on local networks. Because of IoT and Smart Home devices relying on that functions a lot, mDNS continues to play a crucial role in many modern networks.
When dealing with mDNS poisoning with Responder though, we only need to focus on the name resolution process:
- Clients send a mDNS multicast request into the local subnet asking, “Who is <FQDN>?”
- Other clients on the same subnet listen for these mDNS requests
- The client that owns the requested FQDN responds
Responder explained
All the previously mentioned protocols share the same problem: they lack a mechanism to verify the integrity of the responses. In other words, when you receive a response to a name resolution request via NBT-NS, LLMNR, or mDNS, there’s no guarantee that you’re actually communicating with the intended recipient — you might be interacting with a malicious actor pretending to be them.
Responder is a Red Team / Penetration Testing tool used to poison LLMNR, NET-NS and mDNS. In other words, Responder allows us exploiting all the name resolution processes I mentioned before by answering said requests and pretending to be the intended recipient!
Whenever a device sends out a broadcast or multicast request (via LLMNR, NBT-NS, or mDNS) to resolve a hostname, Responder jumps in and replies, pretending to be the requested host – even though it’s not.
In addition to spoofing these name resolution requests, Responder also launches several fake services — such as SMB, HTTP, FTP, and others. Once a client resolves a hostname to the attacker’s IP address, these fake services are ready to respond immediately, typically prompting the user for authentication. If a user takes the bait and enters their credentials, those credentials are captured by the attacker and can be reused for lateral movement or further exploitation within the network.
Attacking with Responder
Enough theory—let’s get practical and simulate a real-world attack using Responder!
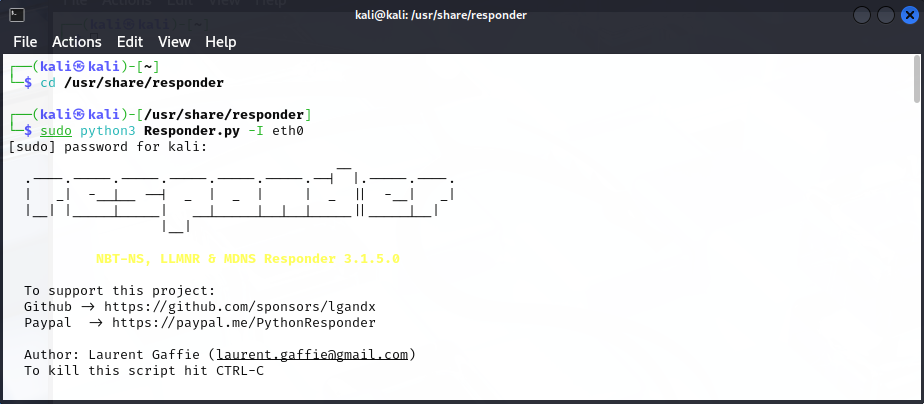
First, I launch Responder on my Kali Linux system. As soon as it starts, Responder begins poisoning name resolution requests and offering fake services for all clients to connect to.
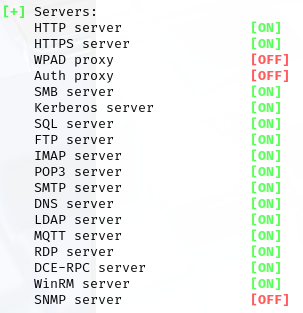
It also provides a clean overview of which services are currently being offered:
Next, I switch to my Windows target client, which has no DNS server configured. This is an important detail, since using trusted DNS server is one of the most effective mitigations against this kind of attack.
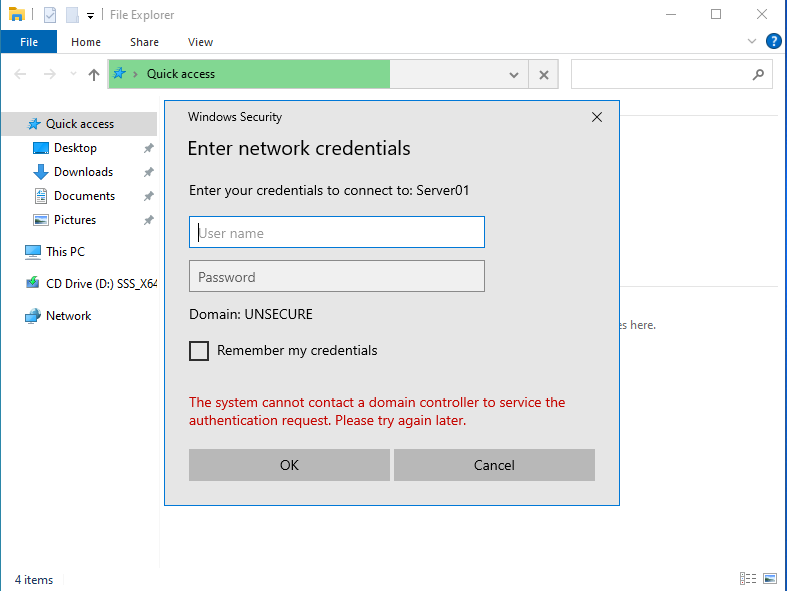
From the Windows machine, I attempt to connect to “Server01” using SMB and HTTP. Since DNS resolution fails, the system falls back to LLMNR, where Responder comes into play and answers!
When trying to connect to “\\Server01”, Responder prompts for credentials via SMB:
When trying to connect to “http://Server01”, Responder prompts for credentials via HTTP:

Once I enter my credentials into one of the prompts, they are captured and stored by Responder. Immediately afterwards, the following output appears in the Responder terminal on Kali Linux:

The captured NTLM hash can now be used for offline brute-force attacks or Pass-the-Hash (PtH) attacks. The attack was successful!
Defending against Responder
Luckily, there are a some good & easy ways to defend against Responder Attacks! We will go through all of them, one by one.
Use a DNS Server
Since DNS is the first option in most systems Name Resolution Order, relying on a DNS server eliminates the need for fallback protocols in many cases.
However, this doesn’t completely eliminate the risk. If the DNS server becomes unavailable, for example due to DDoS attacks or network issues, your clients are going to use NBT-NS or LLMNR. Also, mDNS is used by IoT or Smart Home Devices by default, no matter if a DNS Server is available or not.
Additionally, DNS servers do not address issues caused by typos in hostnames. If a user attempts to connect to “Server01” but mistypes it as “Srever01”, DNS won’t be able to resolve the name. As a result, the client will fall back to NBT-NS / LLMNR, allowing a malicious actor running Responder to reply with “That’s me!” and poisen the connection.
Disable NBT-NS
Disabling NBT-NS seems like a simple solution, but it can be tricky. Some legacy software or network appliances may still rely on it, so turning it off without proper checks could potentially break such systems within your network.
To begin, you’ll want to identify which devices are still using NBT-NS. An easy method would be to set up a port mirror that mirrors all of your network traffic and connect a machine running Wireshark to it. From there, filter the traffic for UDP port 137. This will give you a good overview of which clients are still actively using NBT-NS, allowing you to further investigate whether they really depend on it before making any changes.
Once this has been determined, NBT-NS can be disabled. Since NetBIOS over TCP/IP (NBT) is configured individually for all network adapters, there are two main approaches depending on how the machine obtains its IP address.
For Machines with DHCP configured
For machines configured to use DHCP, NBT-NS should be disabled directly on the DHCP server. By setting the appropriate DHCP option, clients will inherit this setting automatically and will not use NBT-NS.
For Machines without DHCP configured
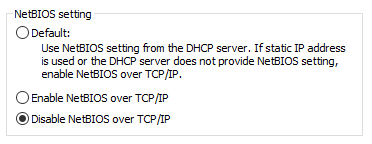
For machines with static IPs, NBT-NS can be disabled by opening “ncpa.cpl”, right-clicking the adapter > Properties > Internet Protocol Version 4 (TCP/IPv4) > Properties > Advanced > WINS > select “Disable NetBIOS over TCP/IP”. This needs to be done for every network adapter.
Since there are currently no GPOs available to simplify this process, and doing it manually can be time-consuming, a possibility would be to automate this. You could for example roll-out the following Powershell Start-Up Script via GPO:
Get-WmiObject -Class Win32_NetworkAdapterConfiguration -Filter "IPEnabled = 'True'" | ForEach-Object {

    $_.SetTcpipNetbios(2)

}
Disable LLMNR
Disabling LLMNR is also a valid mitigation However, just like with NBT-NS, ensure that no software on your network depends on it before proceeding. That said, LLMNR is generally easier to phase out than NBT-NS.
When it comes to disabling LLMNR, there’s a GPO available located at:
"Computer Configuration > Administrative Templates > Network > DNS Client > 'Turn Off Multicast Name Resolution'"
Disable mDNS
Since mDNS is widely used in modern IoT and Smart Home devices, as well as in Apple’s Bonjour services, you should definitely analyze your network for mDNS traffic before disabling it.
That said, mDNS would need to be disabled at the Network Firewall or Host Firewall level on all non-Windows devices within your network. To disable it for your windows machines, you can enroll a Windows Firewall Rule via GPO, blocking UDP Port 5353.
Anti-Malware / Application Whitelisting / IDS
Clients with anti-malware solutions installed can detect tools like Responder by using hash-based signatures or behavior analysis. Additionally, clients with application whitelisting enabled are restricted to running only approved software, effectively preventing tools like Responder from executing. This, of course, only applies to managed clients and is effective only against attackers who are currently in the process of lateral movement.
IDS solutions, on the other hand, can alert administrators about suspicious network traffic regardless of whether the clients involved are managed or not. This helps to prevent malicious, external clients from executing such attacks.
Using secure protocols
Secure protocols such as HTTPS, LDAPS, Kerberos authentication, SMB signing, and SMB encryption introduce cryptographic protections. These protections authenticate both sides of the communication and encrypt the transmitted data.
For example, if a user tries to access a web service over HTTPS and is redirected to a rogue Responder server, the browser will detect the invalid TLS certificate and present a security warning, preventing the connection.
Scanning your network for insecure protocols in use and getting rid of them will help mitigate Responder attacks.